What is a Rack Mount Patch Panel?
It’s easy for us to understand what is a rack mount patch panel. Firstly, you need to bear in mind it’s definitely a patch panel. Sharing the same blood with a patch panel, patch panel rack version is also a mounted hardware assembly containing ports to connect and manage the incoming and outgoing fiber or copper cables. Then, you need to differentiate the rack mount patch panel with wall mount patch panel, the other type of patch panel. When a patch panel associated with the rack mount, it refers specially to a kind of patch panel connecting with racks or rack mount enclosures in a typical data center network.

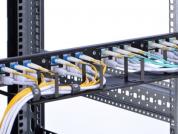
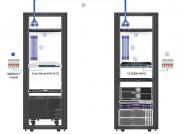
Figure 1:Rack Mount Patch Panel Cabling
Types of Rack Mount Patch Panel
Basically, the rack mount patch panel consists of fiber optic patch panel and copper patch panel used for different applications.
For a rack mount fiber optic patch panel, it is mostly designed for the standard 19-inch rack. Depending on the number of connections required, it is often available in 1U, 2U, 4U configurations with flat or angled design. Typically, the rack mount fiber patch panel has four empty slots where LC/SC fiber adapter panels or cassettes can be installed prior to or during deployment. All in all, according to the space and requirements of your project, there will always be an optical fiber panel suiting for you.
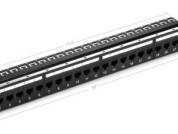
The other type is the copper patch panel. The copper patch panel can be inserted with both shielded or unshielded copper cables like cat5e, cat6, cat6a, and cat7. Among all these types, the cat6 patch panel is the most favored one used for the Gigabit Ethernet high-density cabling. In addition, all these types of rack mound copper panels are available in 24 ports and 48 ports in the market.

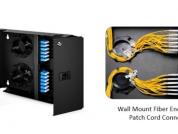
Figure 2: 24 Ports 1U Rack Mount Fiber Optic Patch Panel (Left) and 24 Ports 1U Shielded Cat6 Rack Mount Patch Panel (Right)
Steps of Installing Patch Panel in Rack
Clearing about the rack mount patch panel is just a warming-up step for a better installation. Generally, there are three main steps for users to install a blank rack mount patch panel. If a pre-loaded rack mount is hold, you can directly start from the second installation step.
Before installation, the user should evaluate how many rack units are going to be used. Then you can decide the number and the size of the patch panel. After that, you need to choose the jacks that you are going to use. Then you can install the jacks into the patch panels.
First, you can hold the drawer of patch panel at the height of the layer of the rack you need to set and push it forwardly. Then you need to use the appropriate machine screws to attach the patch panel assembly to the rack.

Figure 3: Installing Rack Mount Patch Panel
Second, insert cables into the matching port one by one. After that, you can use a strap to secure the cables. Typically, for fiber optical cables, we would prefer to use Velcro cable tie to strap; while copper cables, we would use Nylon cable tie.
Third, if there is a need, you can write specific information on labels for identification.
Finishing the second step, you still need to make a visual inspection to ensure the safety of all the network environment. After following all these three steps, the installation can be finished.

